Table of Contents
Welcome to our comprehensive guide on adding your first product in WooCommerce! Whether you’re launching a new online store or expanding an existing one, this guide will walk you through the process of setting up your product with ease. Follow along, and by the end, you’ll have your product live and ready for customers to purchase.
Step 1: Access the WooCommerce Product Page
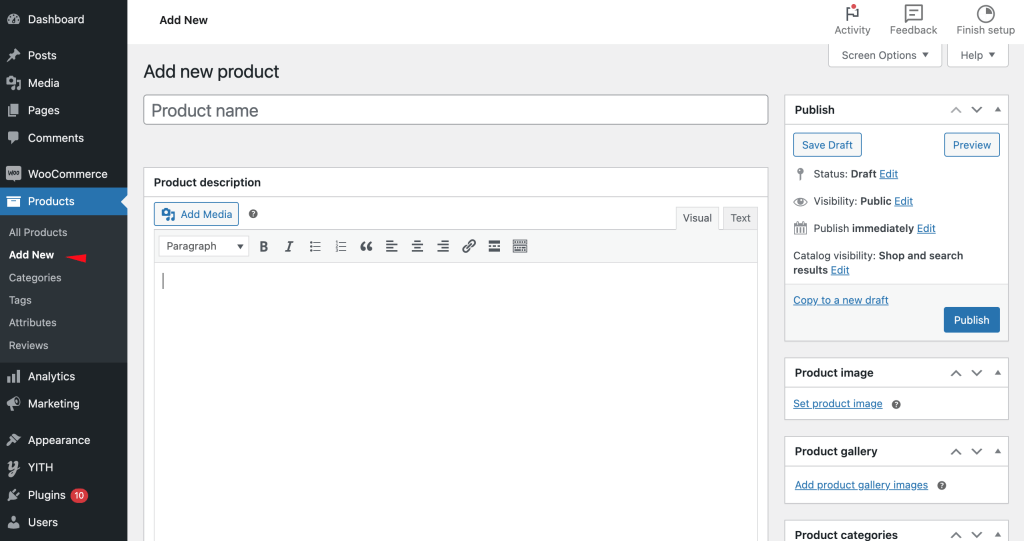
To start adding a product, log in to your WordPress dashboard. On the left-hand menu, hover over “WooCommerce,” then click on “Products.” Next, click on the “Add New” button at the top of the page.
Step 2: Enter the Product Name and Description
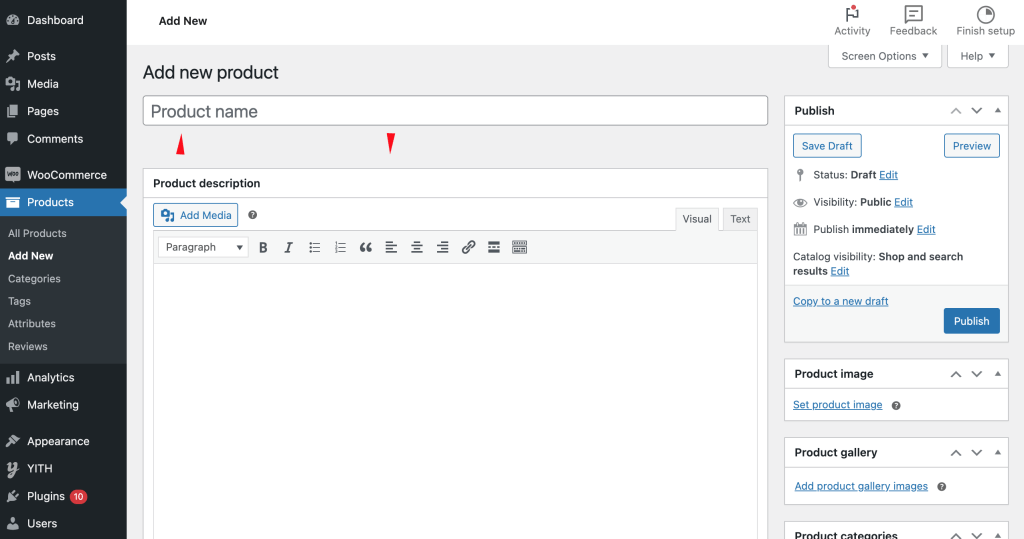
In the “Product Name” field, enter the name of your product. Make it clear and concise, so your customers instantly know what you’re offering.
Below the product name, you’ll see a large text area labeled “Product Description.” This is where you can write a detailed description of your product. Highlight its key features, benefits, and anything else that makes it unique.
Step 3: Set the Product Data
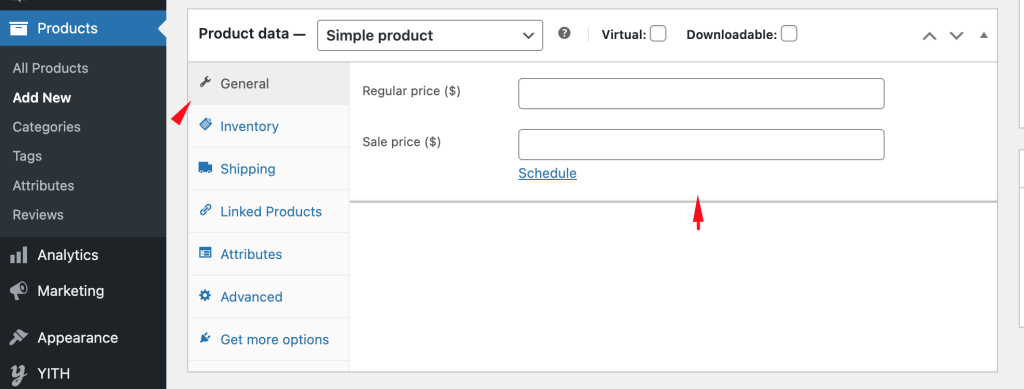
Scroll down to the “Product Data” section. This is where you’ll configure all the important details about your product. WooCommerce offers different product types such as Simple, Grouped, External/Affiliate, and Variable. For most products, you’ll select “Simple Product.”
Pricing:
In the “General” tab, set your regular price in the “Regular Price” field. If you’re offering a discount, you can also set a “Sale Price.” You can schedule the sale to start and end on specific dates if you want.
Inventory:
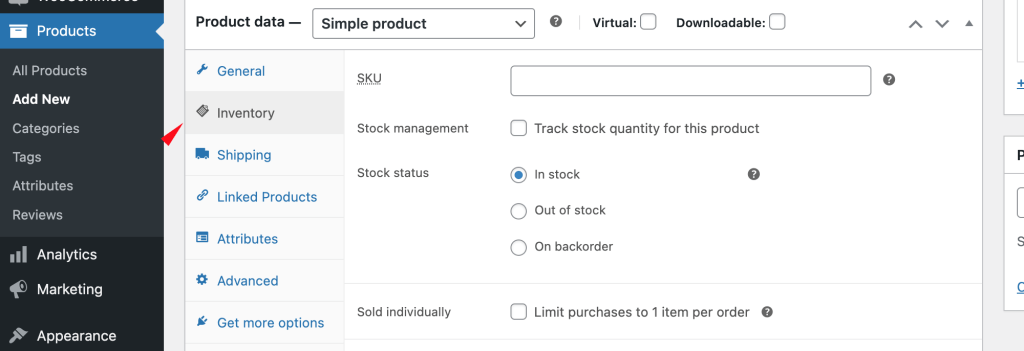
Click on the “Inventory” tab to manage your product stock. Enter the SKU (Stock Keeping Unit) if you have one. Enable stock management by checking the “Manage stock?” box. This allows you to specify the stock quantity, and WooCommerce will automatically update this as customers make purchases. You can also set a low stock threshold to receive an email alert when inventory is running low.
Step 4: Add Product Attributes
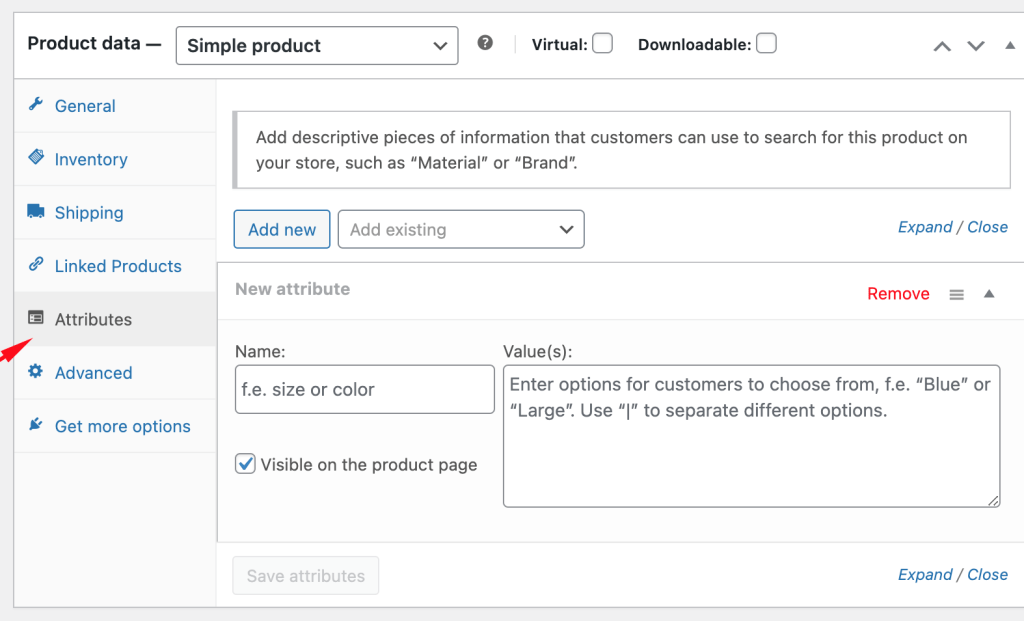
If your product has different variations (e.g., sizes, colors), you’ll want to add attributes. Click on the “Attributes” tab, then “Add” to include a new attribute. Name the attribute (e.g., Size) and add the values (e.g., Small, Medium, Large). You can use these attributes later if you want to create variations of your product.
Step 5: Upload Product Images
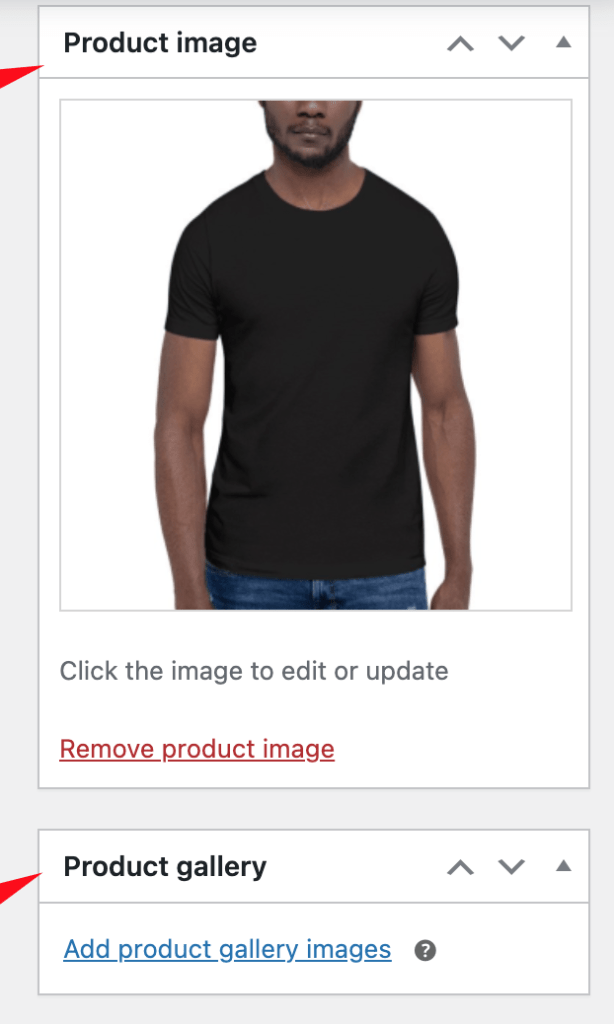
High-quality images are essential for showcasing your product. Scroll down to the “Product Image” section on the right-hand side of the screen. Click “Set product image” to upload your main product image.
If you have additional images, you can add them to the “Product Gallery” section. This creates a slideshow of images, allowing customers to view the product from multiple angles.
Step 6: Add a Short Product Description
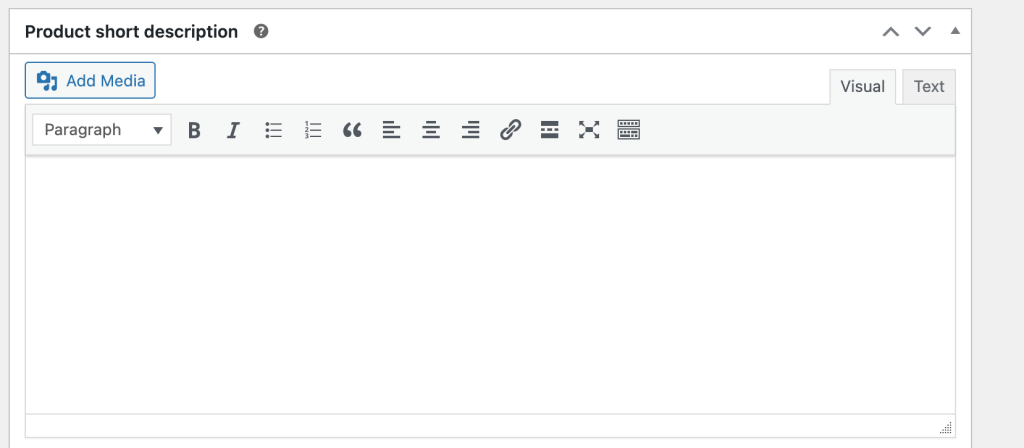
At the bottom of the page, you’ll find a “Product short description” section. This appears next to your product image on the product page. Keep it brief but impactful—this is a quick summary that helps customers understand the key benefits of your product.
Step 7: Categorize and Tag Your Product
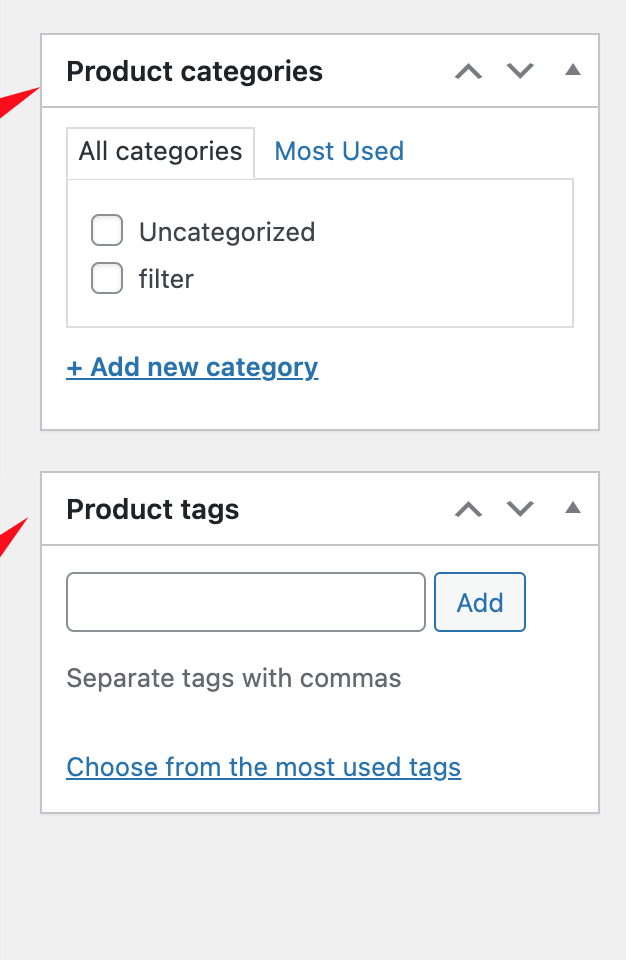
Organizing your products makes it easier for customers to find what they’re looking for. On the right side of the screen, you’ll see options to add categories and tags.
- Categories: Create or select a category that fits your product (e.g., Clothing, Accessories).
- Tags: Tags are like keywords that help customers search for your product (e.g., “summer,” “organic”).
Step 8: Publish Your Product
Once you’ve entered all the necessary information, it’s time to publish your product! Simply click the “Publish” button at the top right of the screen.

Step 9: Preview Your Product
After publishing, it’s always a good idea to preview your product to ensure everything looks right. Click on “View Product” at the top of the page to see how your product appears on your site.
Conclusion
Congratulations! You’ve successfully added your first product to your WooCommerce store. With these steps, you can continue adding more products, each time fine-tuning the details to attract and engage your customers. Remember, a well-structured product page with clear information and quality images is key to driving sales.
For more tips and tutorials, be sure to check out our other articles and videos in this series. Happy selling!

