[vc_row][vc_column][vc_column_text]https://youtu.be/8O43xlzsd2Q
This tutorial is a step-by-step guide to teach you how to create a custom product on a WooCommerce store using the Allada T-shirt Designer plugin.
Firstly, you have to independently create a T-shirt Product on your WooCommerce store. You will also need to create a configuration, then you can create a Simple or Variable Product.
Creating a configuration:
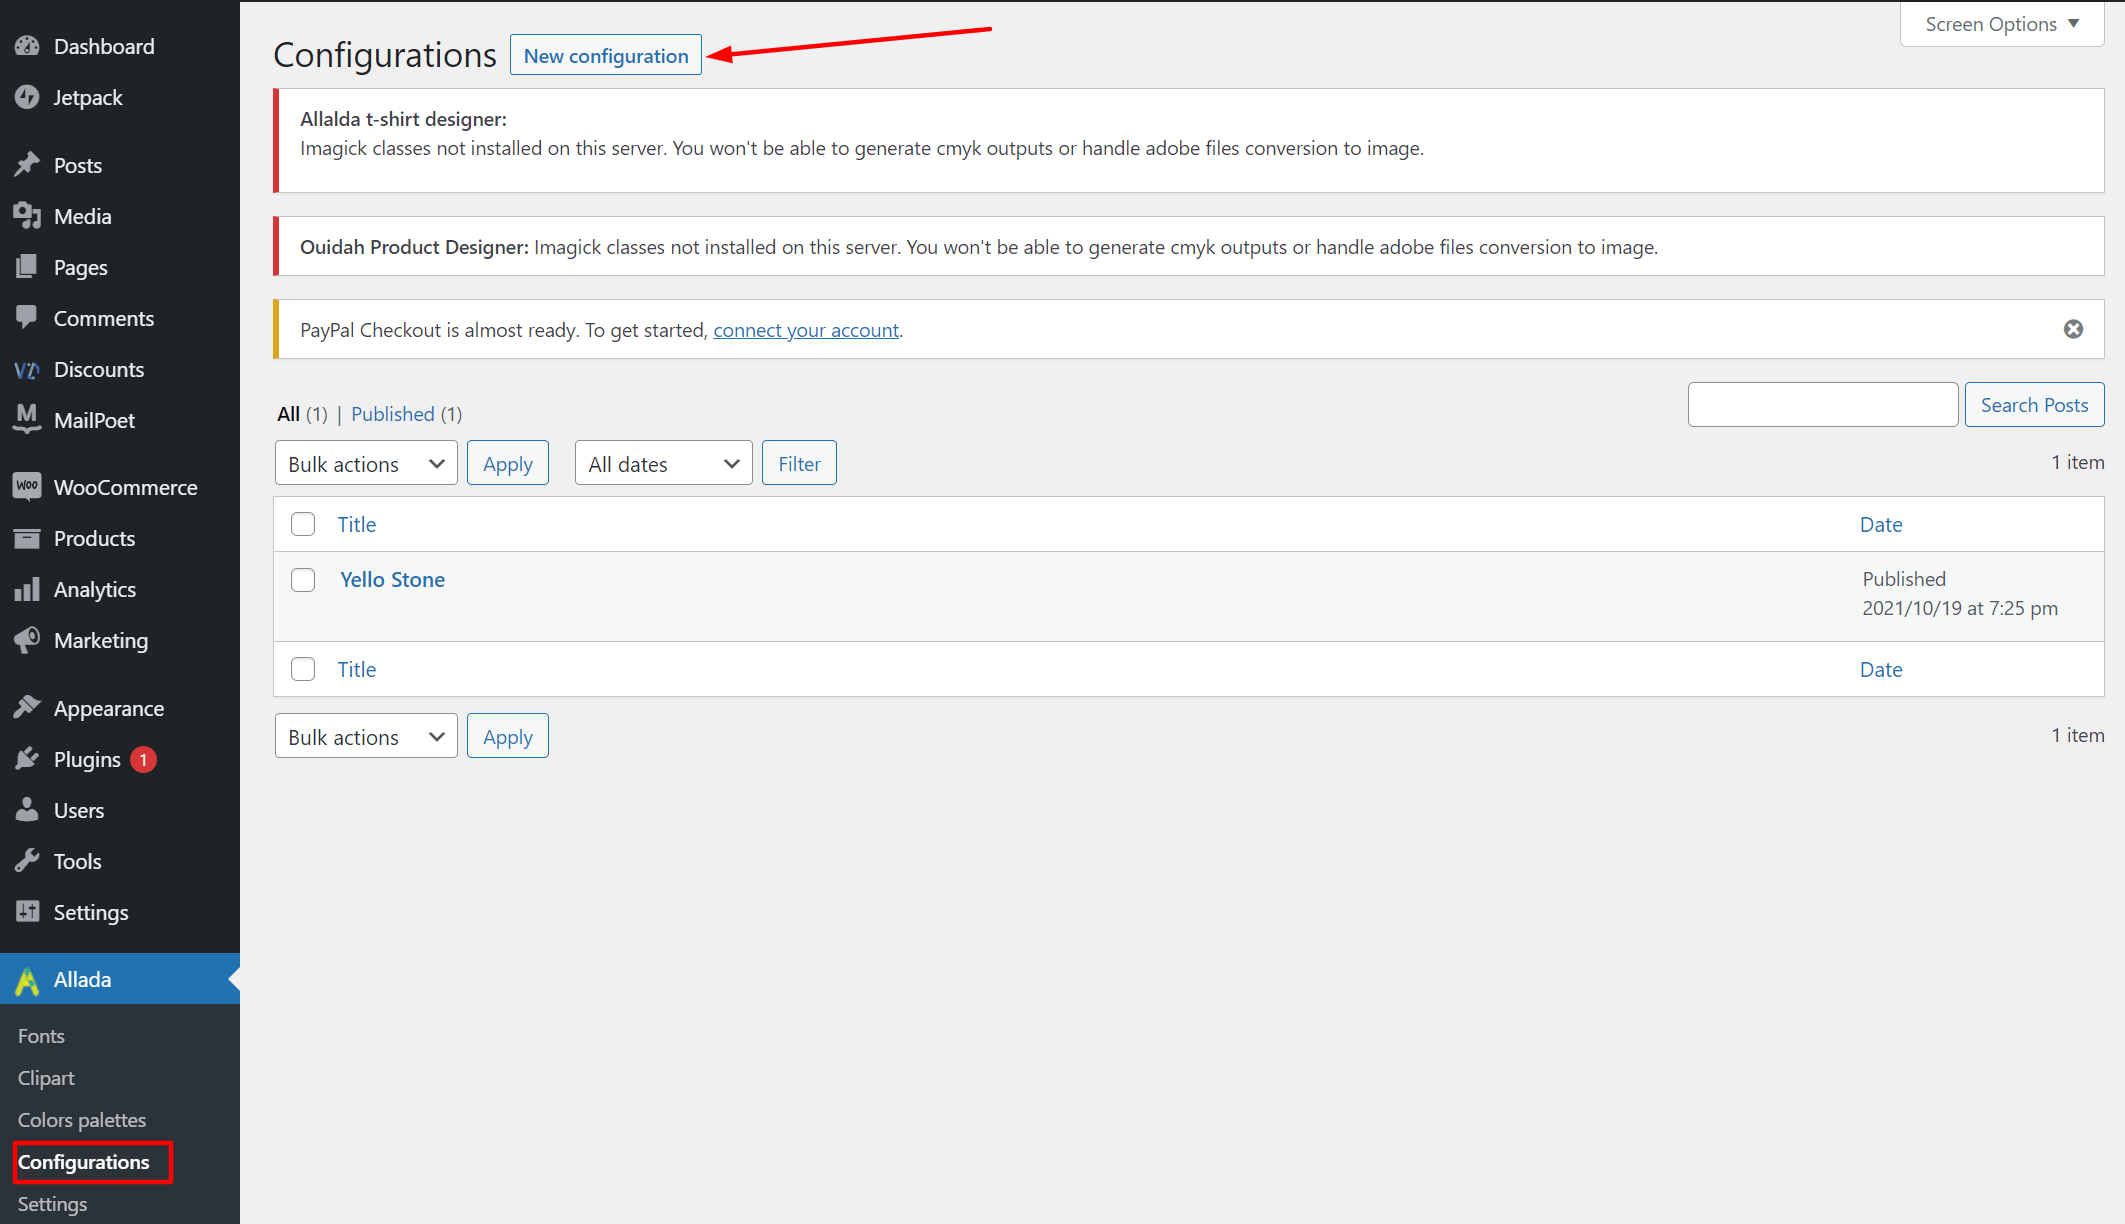
1. On your dashboard, go to Allada > configuration on T-shirt (or whatever you had named your t-shirt product.)
2. Add a title for your new configuration and select the parts you’d like to make customizable.
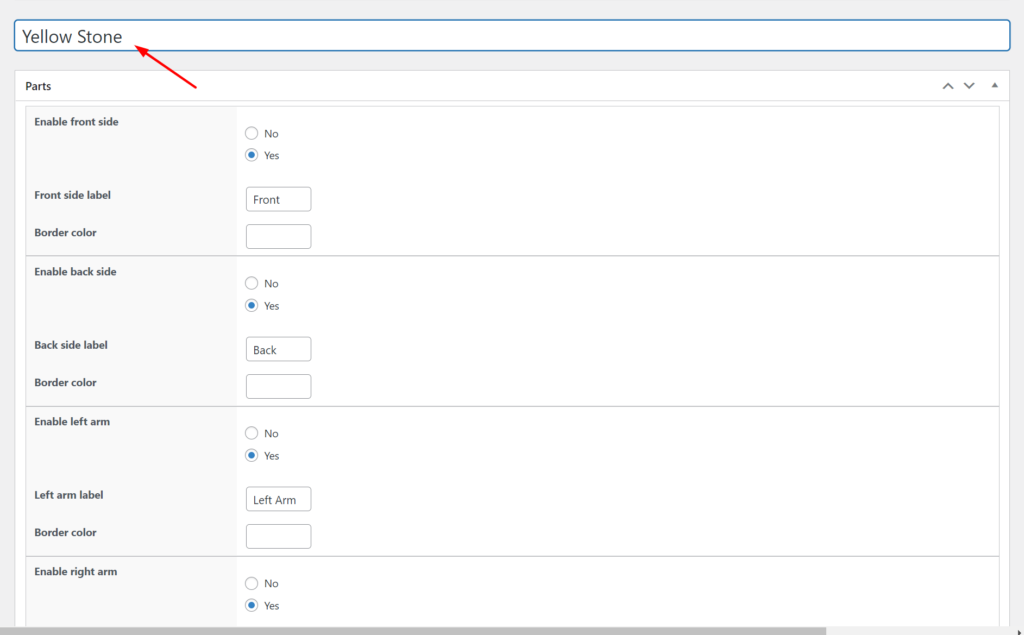
3. When finished you can click on the “Publish” button. Remember that you can add several configurations.
To create a variable product:
A variable product is a product type that lets you sell a single product with different variations. A shirt with multiple colors or sizes is an example of a variable product. To create a variable product;
- On your dashboard, go to Product > Click on T-shirt (or anything it is, you had named your product.)
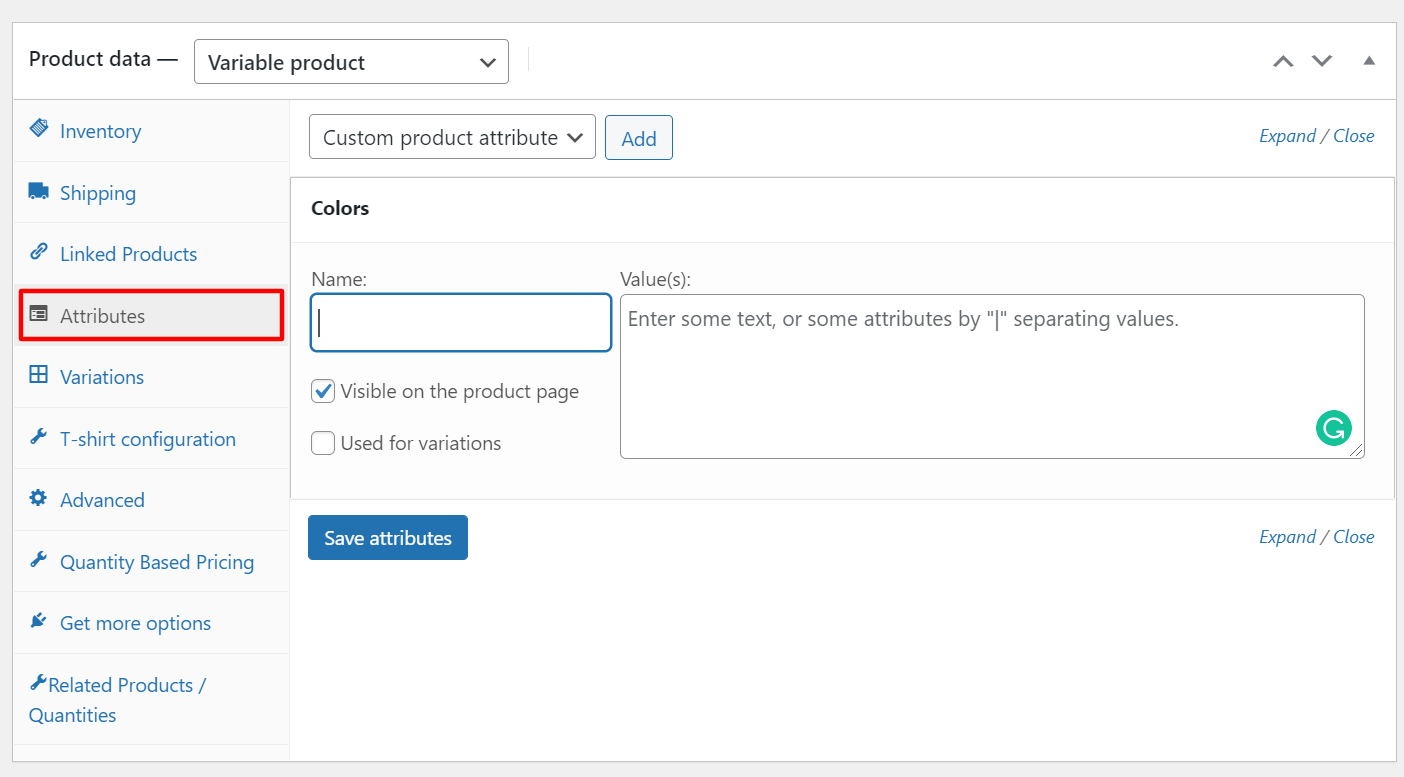
- Scroll down to the Product Section, and choose/select “Variable product”.
- Click on the option “Attributes”.

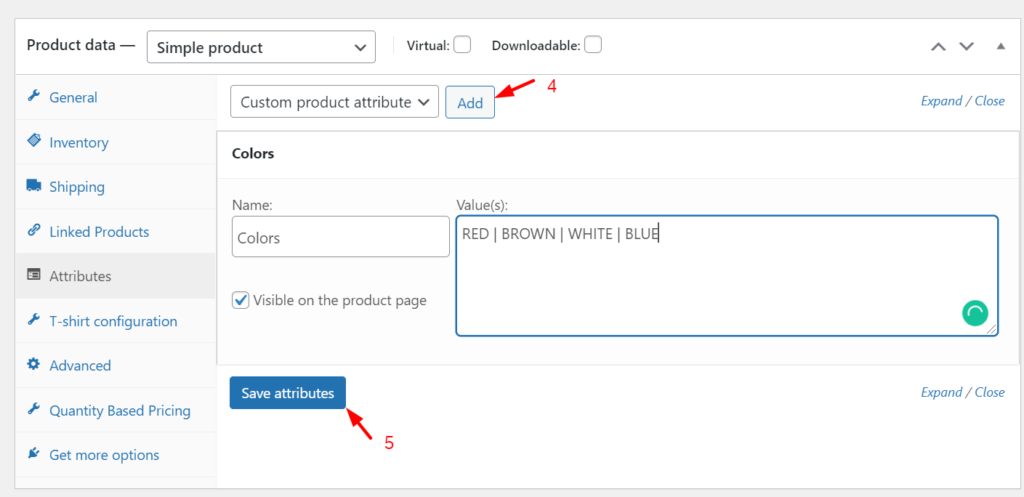
- Click on the ‘Add‘ button beside – Custom product attribute. Fill the name and value column.

- Then, save attributes.
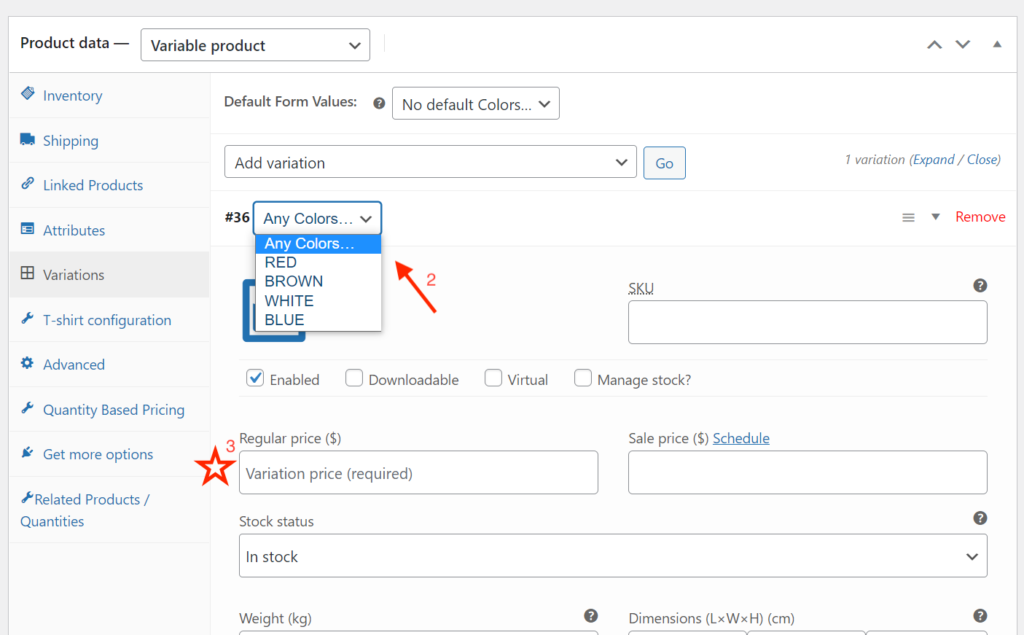
After all, this is done, it’s mandatory to set a regular price. Without this, your variation will not be taken into account. In this section, you can decide to either set a fixed price for all values or a custom price for each value of the variation.
For example, the attribute above is Color and it has 4 values (Red | Brown |White |Blue). You can either decide to set one price for all the colors or set a different price for each color.
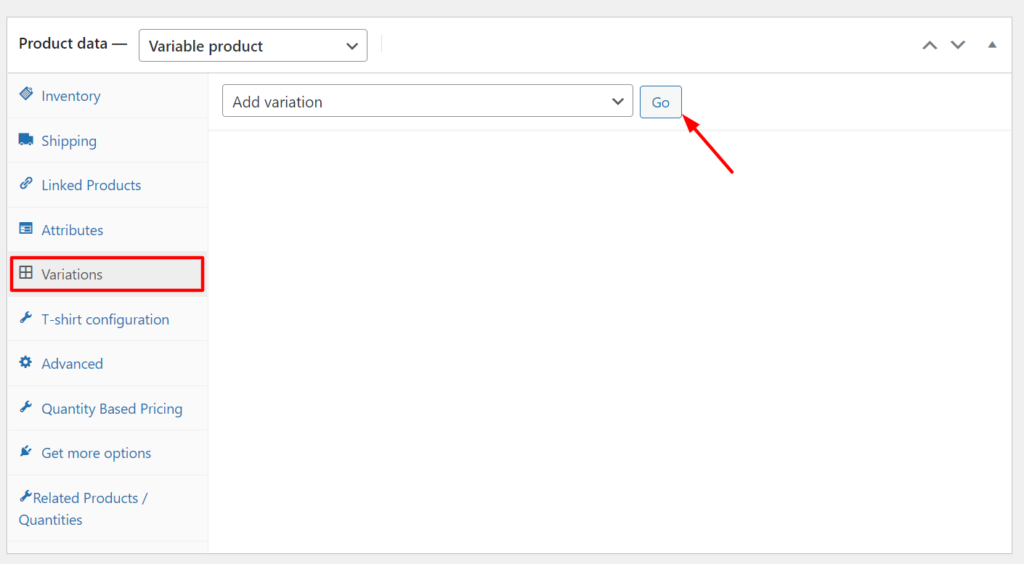
- Click on the option ‘Variations’> Click on ‘Go’ to add a variation.

- Then choose the variation you wish to set price for. (N.B: You have to click on ‘expand’ to display the details).

- Enter ‘variation price‘.
- Then click on ‘save changes‘
- Write a short description of the product.
- All the configuration of the t-shirt is played at this level, on the T-shirt configuration tab.

Easily attract more customers and grow your business by using our Custom Product Designer for Woocommerce.
How can a customer customize a product?
Once a product has been set as customizable, there are 2 ways for customers to customize it:
- From the shop page (simple products only): a Design Now button will appear beside the Add to cart button. A click on it will lead the user to the editor page with the product data already loaded.
- From the product page: a Design Now button will appear beside the Add to cart button. A click on it will lead the user to the editor page with the product data already loaded. If the product is variable, make sure you select the options before clicking the Design Now button.
Still, need help? Reach out to us via the comment section below or send us a message.
[/vc_column_text][/vc_column][/vc_row]


I am testing my site locally, but I have set up a store with one variable product, added attributes, and variables, and set a configuration to the variable. When pressing on “Design” It brings me to a blank store page. Why does it seem incomplete?
Hello Tyler,
Thank you for writing to us.
Just to be sure, is the “design page” you set from the plugin’s settings a blank page? Another thing to check would be a quick conflict test to be certain that the issue isn’t triggered by another installed plugin/theme. To run a conflict test, could you please:
– Disabling all other plugins except WooCommerce and our plugin.
– Switching the theme to one of the defaults such as twenty-sixteen.
– Test again.
If everything works as expected, that means there’s a conflict somewhere; so you can start re-enabling the disabled plugins/theme one by one in order to find the culprit.Once you do, please let us know so we can take the next appropriate steps.