Creating a Woocommerce custom t shirt designer store comes with different phases. This article will focus on the process of setting up the Woocommerce custom t shirt designer store with a Product Designer plugin
This tutorial is a step-by-step guide to teach you how to create a woocommerce custom t shirt designer store using a custom t shirt designer.
WooCommerce Product Designer allows any WordPress store to deploy a t shirt customization solution for their customers. Shoppers can create a personalized design by adding images & text, then adjusting fonts & alignments to order a beautifully customized design.
You too can get your WooCommerce custom t shirt designer store up and running in no time by following this simple tutorial.
How to create a standard WooCommerce t shirt as a variable product
Variable products can be used to create a product type with variable attributes such as t shirts, wherein the color and size can be changed. When viewing a product on the front-end the customer will see a product with available options to change the color and size.
They will also be able to see the price and stock availability per variation. If the customer tries to click on the Add to cart button, a prompt will appear directing him to select attributes.
Step 1 – Set the Product Type
- This must be done in WooCommerce, under Products
- Add a variable product by either adding a new product – Add Product, or editing an existing product, Edit.
- Then set the Product Type as Variable product
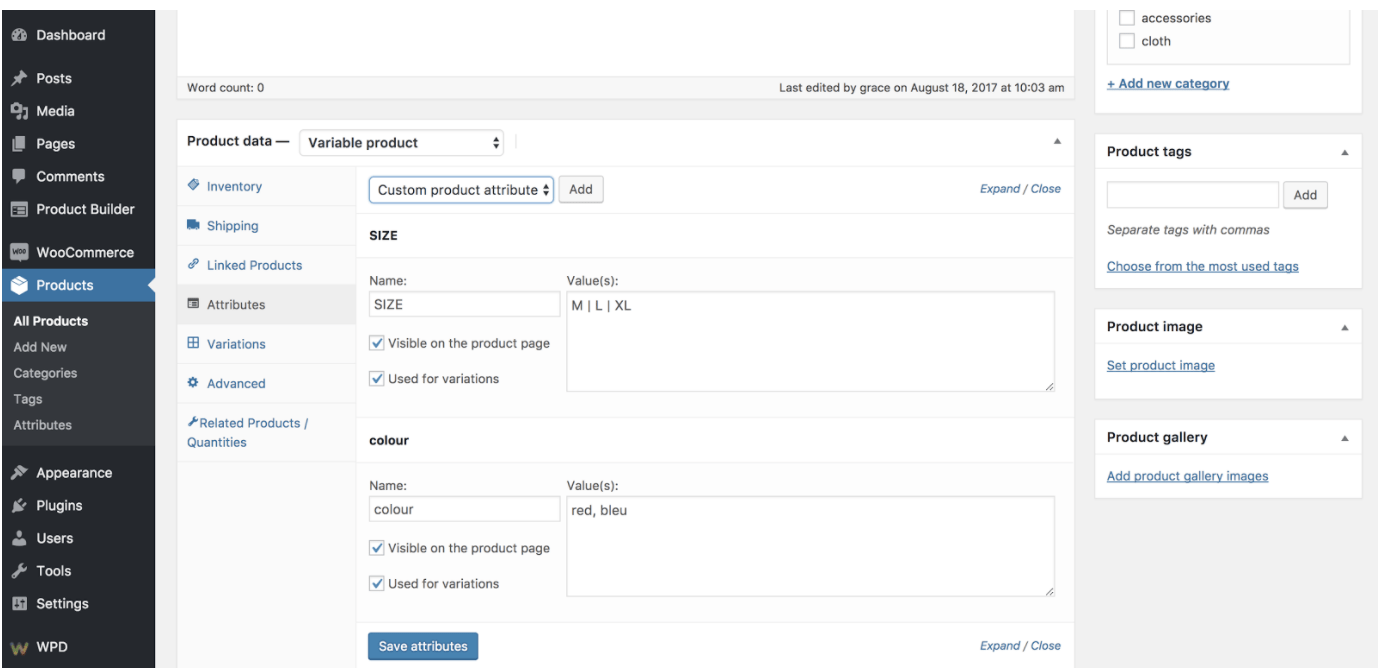
Step 2 – Add attributesYou may select a global attribute from the dropdown or add a custom attribute
For global attributes:
- Select an attribute from the dropdown menu and Add
- If you would like to add all attributes click Select all
- Tick Used for variations
Using custom attributes for specific products:
- Select custom product attribute and Add
- Name the attribute (eg. Size)
- Set values using a vertical pipe to separate (e.g., small | medium | large)
- Tick Used for variations
- Don’t forget to Save attributes
Step 3 – Add variations
- This must be done in the Variations section in the Product Data meta box
- To manually add a variation select Add variation and click Go
- Select attributes such as color and size
- Click the triangle to expand additional data
- Edit any available data and fill in the Regular Price
- Don’t forget to Save changes
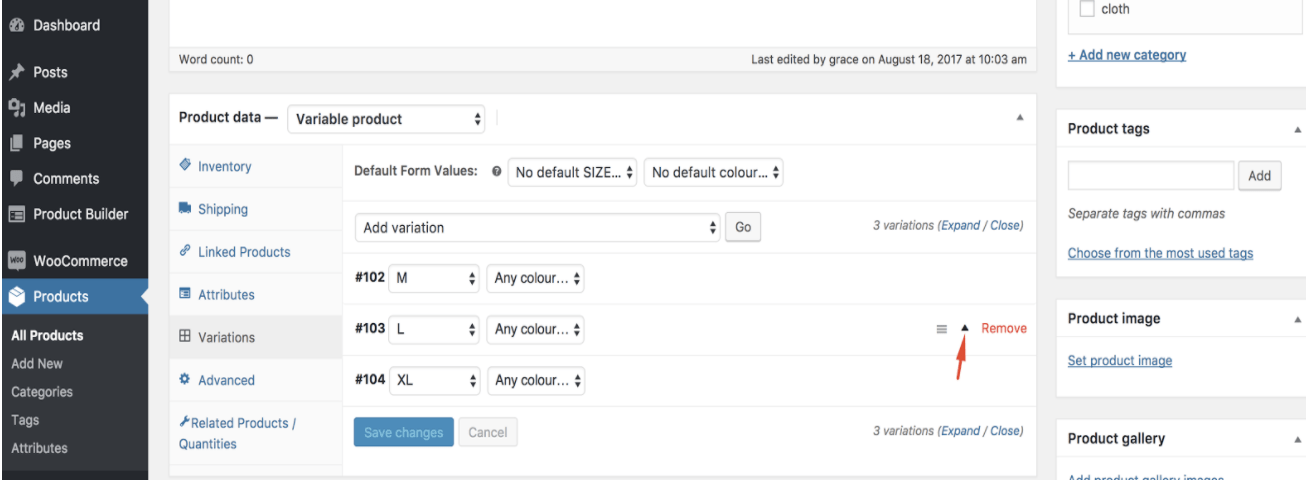
You may edit many variations by navigating forward and backward through the list, provided you have more than 10 variations. Each time you navigate to a new set of variations the previous set will be saved.
You may also set defaults on preferred variations. This variation will automatically appear when a customer visits the page. The customer will be able to Add to Cart directly. You may however only set a default after at least one variation has been created.
All the variation data with respect to variable products will need to be assigned properties. This includes general information, inventory, shipping information and linked products. If the SKU, weight, dimensions and stock fields are not set, the product will inherit values assigned to the variable product. It is also very important to set price fields per variation.
Some quick fixes for speeding through variations include Duplicating a Product, Bulk editing and Linking variations.
How to turn a standard shirt into a custom t shirt using WooCommerce Product Designer?
A regular t shirt can be turned into a custom t shirt by assigning to it a custom t shirt designer configuration. A custom product configuration is a set of parameters which regulates how the product works.
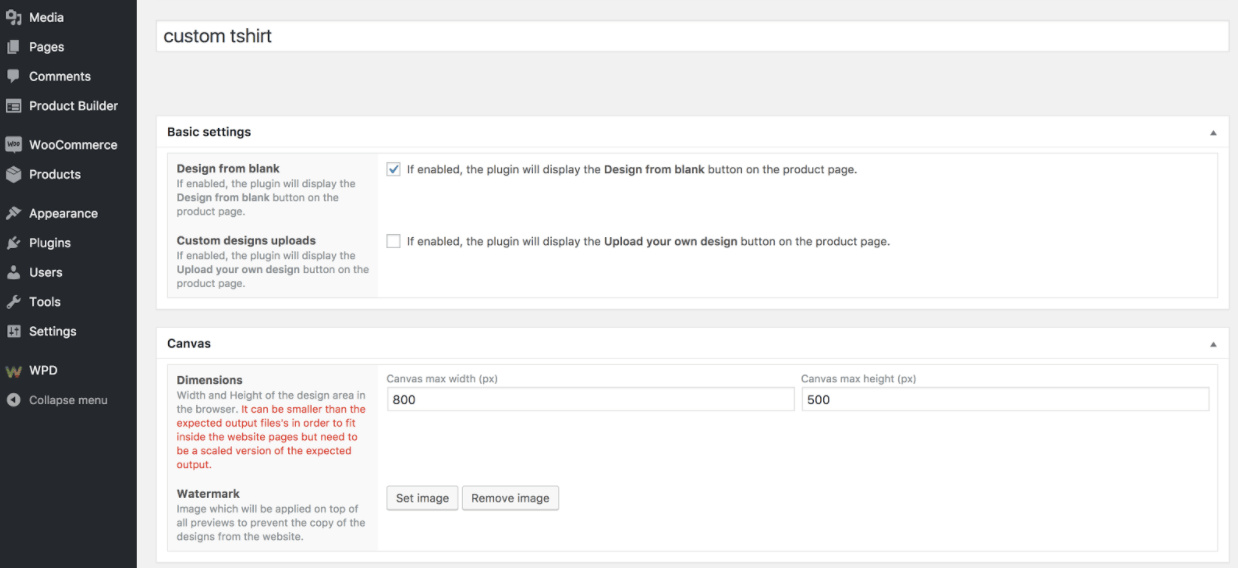
- Go to WPD > Configurations and create a new configuration
- Under Basic settings you can add a Design from blank button
- You can also apply a custom Canvas and define the Parts for your configuration
- Once you have created a configuration you can create a custom WooCommerce t shirt by entering a product name and price, then select the product type and a configuration.
- The same process may be followed for each t shirt variation
You can learn more about how to create a custom product here.
How we designed templates for our Woocommerce custom t shirt?
Templates are great when you want to create several custom products such as t shirts.
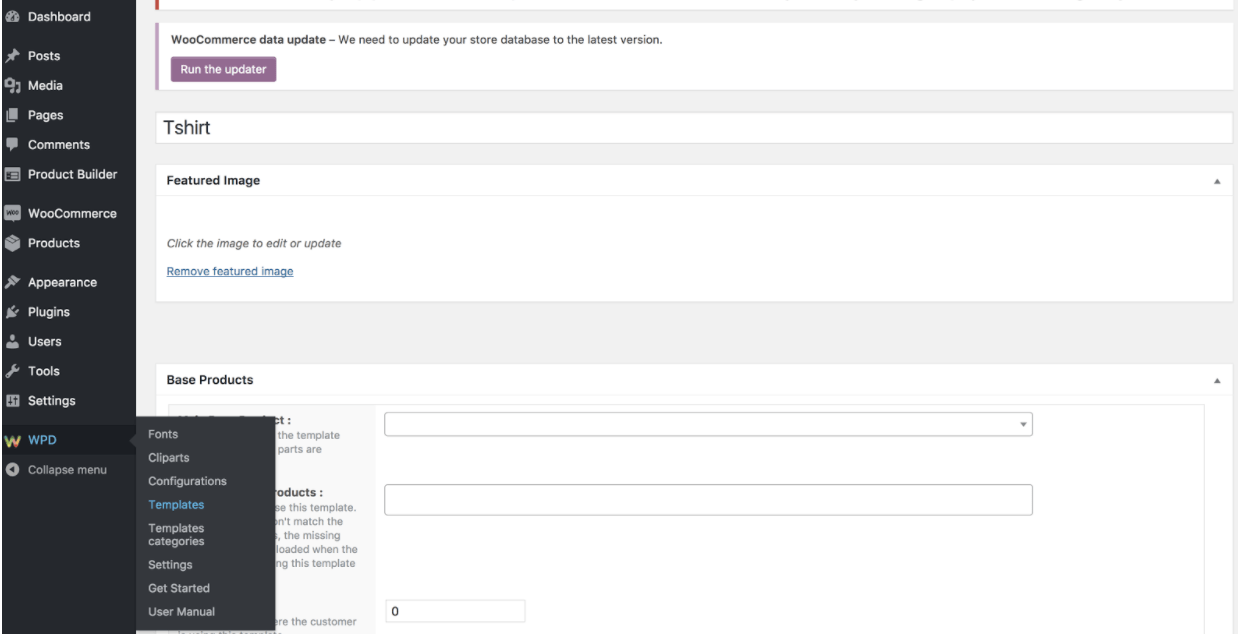
To create a template:
- Go to WPD > Templates
- Click New template
- Select a product
- Assign a Category
- Add formats and features
- Insert shapes
- Upload images
For detailed instructions on using templates visit this page.
How to get images and fonts?
You may be wondering where we obtained the images and fonts used in the demo;
How do we get our images?
We purchased images from Creative Market and manipulated them using photoshop,. You can also purchase images from Envato Elements. Another good resource from which you can get clip art for free is Openclipart.
Where did we find the fonts used in our demo?
We’ve used google fonts, however the plugin also supports custom ttf fonts.
Fonts is the different ways in which you can style your text. Google fonts is a repository of free fonts that you can download or embed into a webpage. With more than 1000 fonts from which you can choose. Download your fonts here.
Custom TTF fonts is a file extension for a font file developed by Apple. TTF files are currently used by Apple and Microsoft as a raster font format. It can be scaled to any size without quality loss or pixelation, and the stored image appears the same when printed as it does on-screen.
How to create the alternative products section?
The alternative products is a feature of the Woocommerce Custom Product Designer which helps your customer select or switch to an alternate product during a configuration without losing his design. This is really useful when a visitor is customizing a blue t shirt for example and then wants to see how it looks on a green one. He can then click on the green t-shirt on the upper left side of the designer.
This woo-commerce custom t-shirt designer is very flexible during manipulation and allows you to work without hassle or frustration.
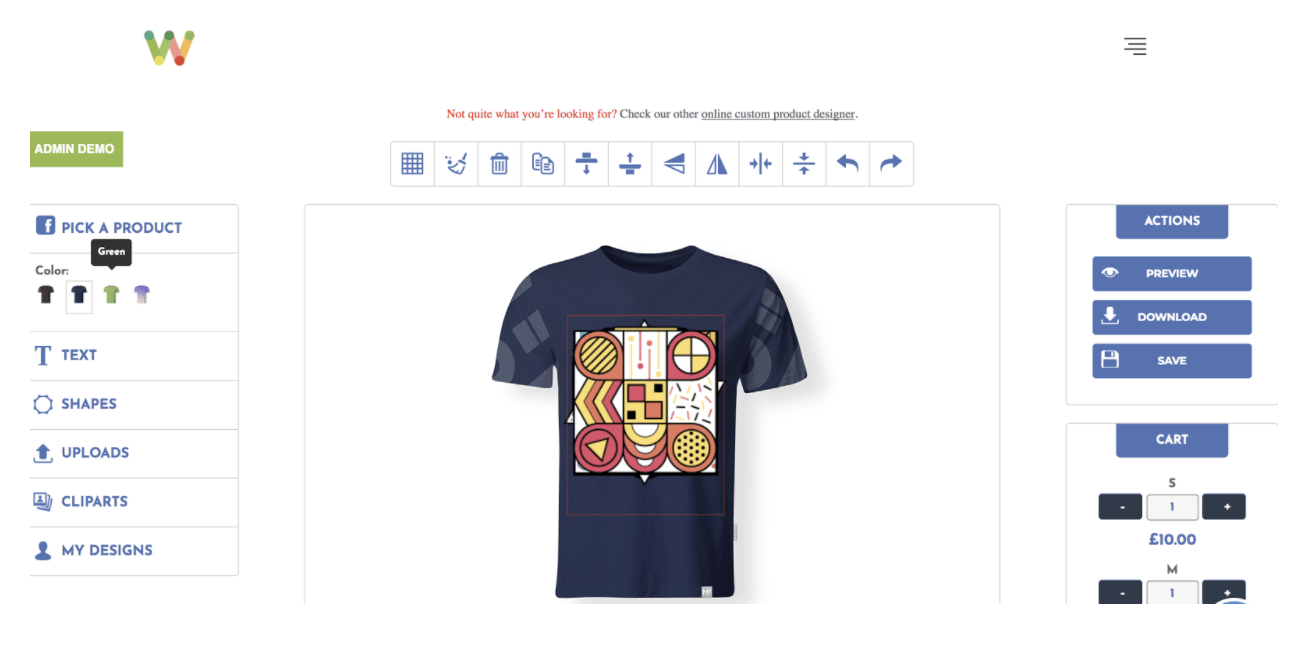
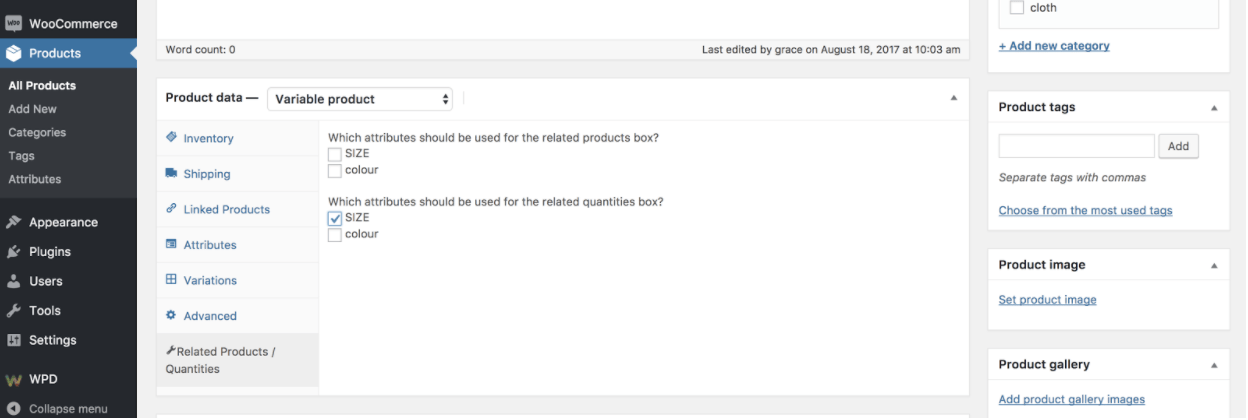
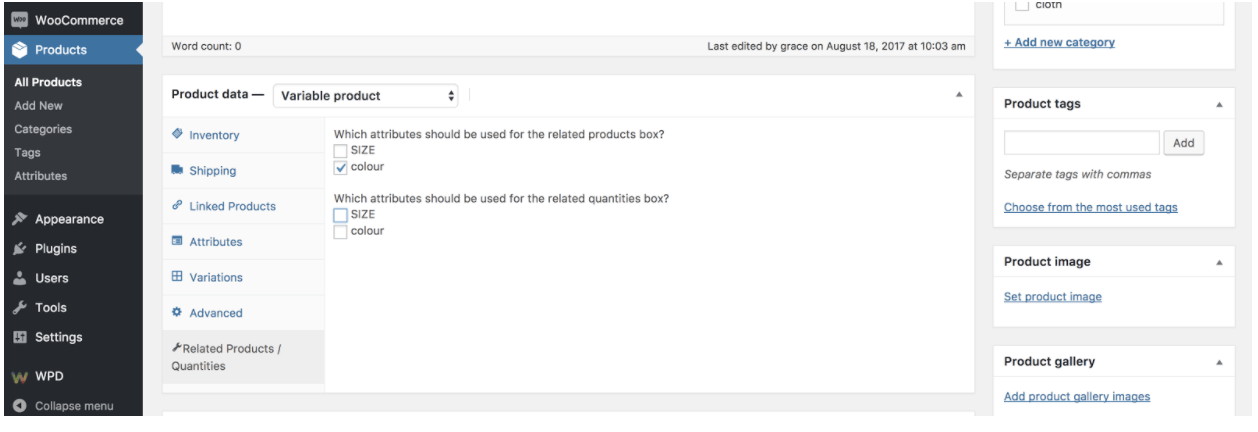
The first thing to know is that this feature is only available for variable products and uses the variation attributes as switches. It can be setup in the Related Products / Quantities section of the variable product for which you wish to enable it as below:
How to setup the alternative quantities section?
The Woocommerce custom t shirt designer has a feature called “alternative quantities” which allows your customer to purchase a variable product in different quantities. Let say for example that the visitor is customizing a red t shirt. Using the alternative quantities feature, he can add the same design in multiple sizes to his cart in different quantities. It can be setup in the Related Products / Quantities section of the variable product for which you wish to enable it as below:
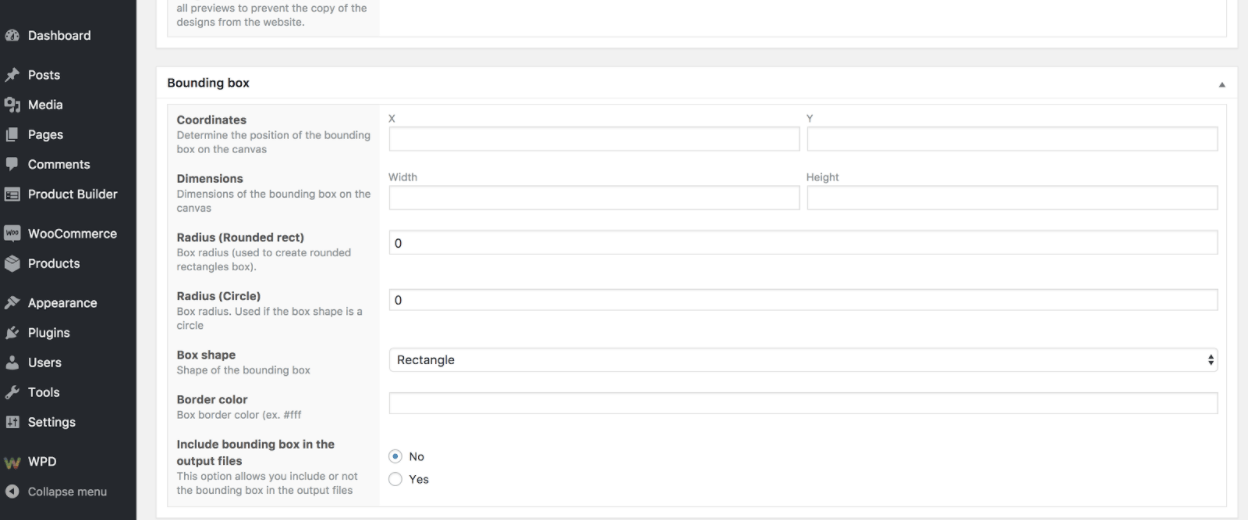
How to set up the editable area (bounding box) in the Woocommerce custom t-shirt designer plugin?
The Woocommerce custom t shirt designer also has a bounding box section, which allows you to set the bounding boxes parameters if needed. This parameter can be used to define the editable area INSIDE the canvas. The client can clearly see the area he can edit during the customization process. For example if you want to configure t-shirt as your product, in the process of creating your configuration you will define the basic setting then the dimensions of the canva. The bounding box section will allow you to set the editable limits to your canva. Make sure you fill the remaining sections and save your configuration.
Has this article been helpful to you? Is there a question on your mind? Feel free to leave a comment in the comment box below.


Hi,Its not showing the WPD option for me now what should I do?
Are you sure you have the pro version installed or are you using the free one?
Amazing!!! Brilliant skills. Love it. Thanks for sharing.
Thanks for leaving a comment!